
BASICH 3.3 GUIDE
Version 1.1, February 1, 2001 by Vorlon001
This
Guide is maintained and hosted by The Vorlon Homeworld. Linking to this guide is
ok by linking to this site, however anyone interested in hosting this guide must first contact Vorlon001
for approval.
PLEASE
READ, VERY IMPORTANT:
The
use, possession or importation of Test (Programmed/Pirate) Cards is Illegal in
the United States. If you are a U.S. resident, you are required by law to
subscribe and use of Test Cards of any kind is unlawful and subject to Criminal
and Civil penalties according to U.S. law. We do not condone use of Test Cards
to U.S. residents. You and you alone are SOLELY responsible for abiding by the
laws of your Country, State, Province or Territory. THE DSS UNDERGROUND and THE
VORLON HOMEWORLD WILL NOT BE HELD RESPONSIBLE FOR THE ACTIONS OF THE PEOPLE
USING THIS DOCUMENT. This Guide is strictly for Canada and for EDUCATIONAL USE
ONLY. Also the DSS Underground and The Vorlon Homeworld
does not and will not take any responsibility for what might happen to any card
using the following procedures. In other words, USE
THIS GUIDE AT YOUR OWN RISK.
So with that out of the way let us say that what we are trying to offer here is a basic and simple instruction that hopefully will make everything as easy for you as possible. We also want these instructions as safe as possible, meaning we want to try our best to avoid having your card become damaged. But remember nothing is absolutely foolproof and don’t let anybody ever tell you differently. Sometimes people, when they run into an error or when they get confused about what they are doing, will guess or attempt to try things on their own resulting in creating possibly a more serious problem. If during any of the following instructions you should get any kind of error message or if you become confused and don’t understand something stop immediately, make note of any on screen message(s) and then go to your favorite Forum Site and seek out advice. Usually there is always somebody online that will be more than glad to help you out. If you do need to seek out help again please be specific when posting your problem and also give as much detail as possible.
BasicH was written by Squeem and was designed to work with H cards and an ISO Programmer. This version was the last in the series that was done and is the standard of this type of program. This guide was written in HTML. This is an easier format to use than Word2000 which does not work well with all systems. You can view these guides using any browser. We would like to thank Squeem for his update of BasicH to now cover updates to USW67.
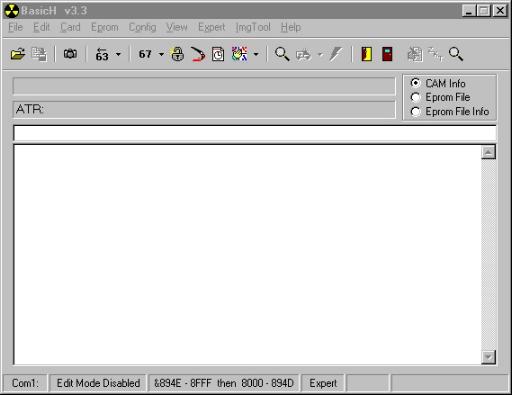
When you first bring up this program, the screen will appear like below. I have it come up in the Expert Mode for most uses so that is the view you see.
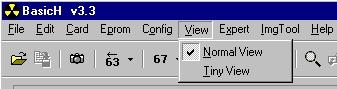
From the menu, select View. You will notice that the Tiny View is checked.

Select the Normal View from the menu and the program screen will change. Note you need more than normal VGA to see this part of the screen.
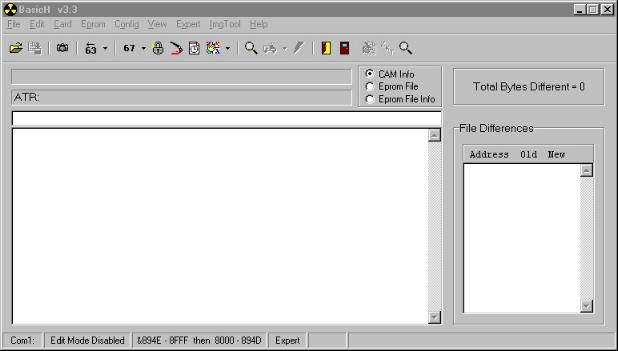
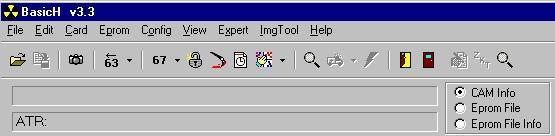
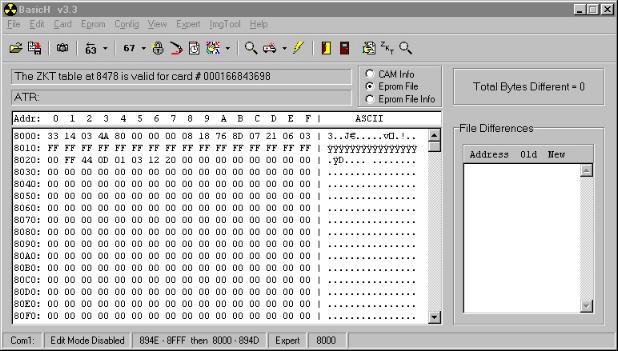
Below is a picture of the full screen in the Expert Mode. The added part of the screen is useful for observing the changes made to the card by the program. It will document each address that is altered during an operation.
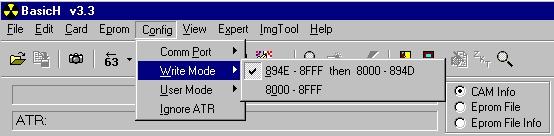
After the screen is setup the way that you want it, you then select Config from the Menu. From here you select the Com Port the program will use.
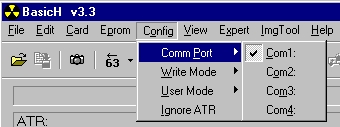
The next selection allows you to change the way the program writes to the card. The normal selection is 894E - 8FFF then 8000 - 894D. If you are in doubt about this selection, read the explanation in the help file on this and the reasons for it's use.
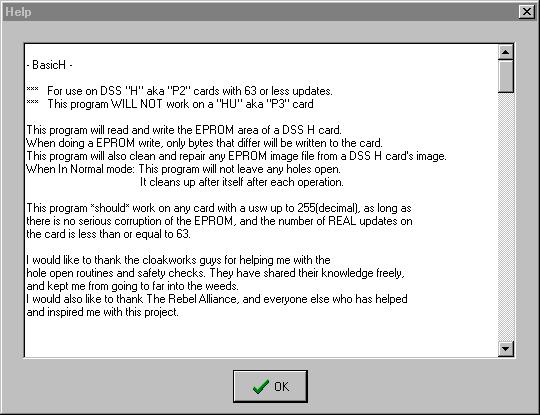
Selecting Help will bring up the BasicH help screen. READ THIS!
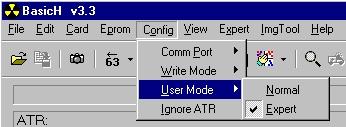
The next selection allows you to set the User Mode. If you select normal, the toolbar functions on the right are not available. Holes are opened and closed automatically and the patching feature and zkt check feature are not available.
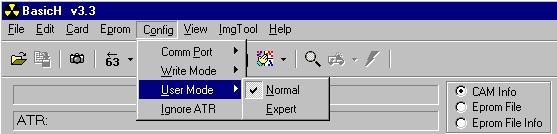
Below is the toolbar for the Normal User Mode.
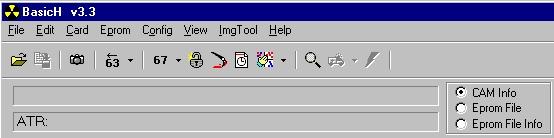
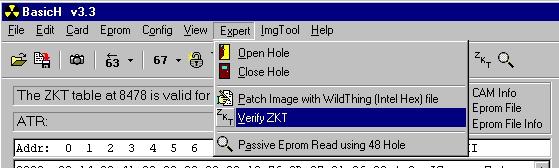
Selecting the Expert mode, enables the rest of the toolbar. In this mode, the opening and closing of holes is not automatic! You must remember to open and close them manually. This is very important.
The added icons are Open Hole, Close Hole, Patch with a wildthing image, check the zkt table, and a passive read ability.
Since the icons on the toolbar are featured in the menu selections, explanations of these are not necessary. If you are just working on a card, the card selection is below. The camera icon, like in Winexplorer, will read the card ATR.
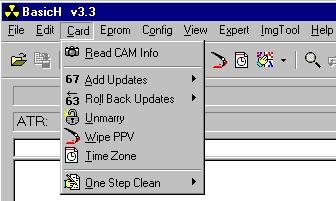
Selecting Add Updates, will add any updates selected from the extended menu to the card. At the present time, it is recommended you leave the cards at 26 Updates to work on them. Later updates were dynamic and do constant writes to a card. The program now allows updating all the way to USW67.

Selecting Roll Back updates will set the updates on the card to the level you select from the sub menu. Again....26 is suggested. This also now starts at USW67 and works it's way back down to 26.

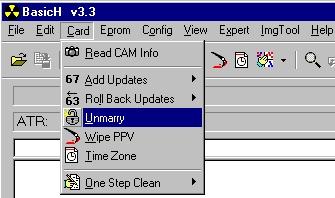
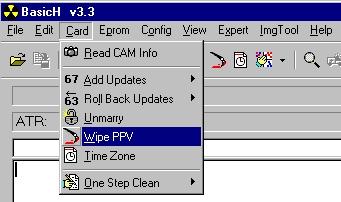
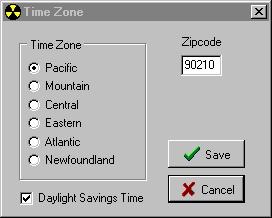
When working with a card that is a sub or activated, the Unmarry feature will just unmarry the card from the IRD. The Wipe PPV will just wipe the PPV purchases and the Time zone will all changing that part of the card, only. The One Step Clean feature, will clean the card to the specified updates. It will unmarry at the same time. Again, at the present time, it is best to clean to 26 Updates when preparing a card for an early script. The functions mentioned so far, work in the normal mode. The holes will be opened and closed automatically and the functions performed by just leaving the card in the ISO Programmer. The time zone and zip code selection screen is shown below:
Notice that the icons in the menu selections match the icons on the BasicH tool bar.
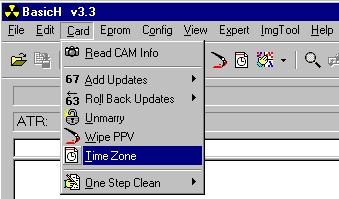
The Time Zone selection brings up the screen, below. You can select your time zone and edit in your correct zip code.
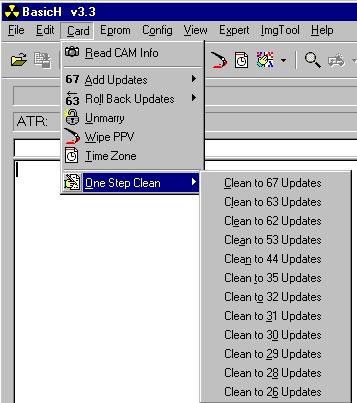
The One Step Clean selection is shown below. It will clean the card to any level from USW67 down to USW26.
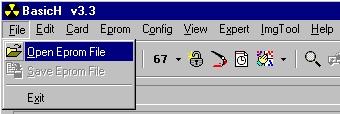
Below you see the File selection of the menu. You can Exit the program from here. You can also open an eeprom file (.bin or .cor).
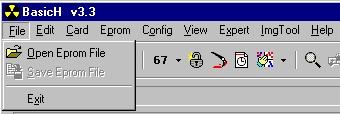
Below you select Open Eprom File.
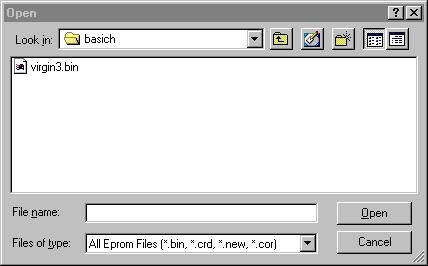
The Windows selection window comes up.
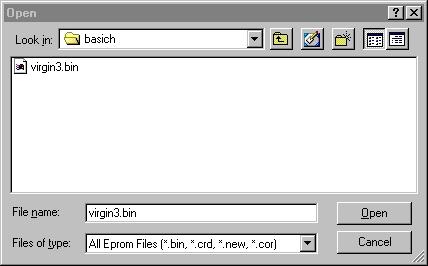
Selecting a .bin file, will change the screen as below. Click on Open and the file will be loaded into BasicH.
You can open an existing file or read the present card into memory, using the magnifying glass icon and the full screen will look like below. The eeprom is loaded into the program memory.
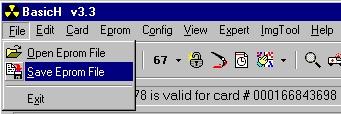
The save eprom feature is activated in the menu if you have either read a card or loaded a .bin file into the program.
Notice that using the Eprom File mouse selection will change what is in the main screen and appear as below:
If you just read the file in from the card, you can save it at this point. If you loaded and existing .bin file, you did so for a special purpose. At this point, you can select the lightening bolt from the toolbar and the loaded image will be written to the card in the Programmer. You can also alter the image in memory manually by selecting the Edit mode, as shown below.
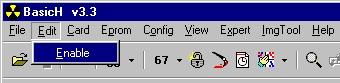
When selected, the Edit Mode Enabled feature will show up on the bottom of the status bar in the program.

When working on a card in the Expert Mode you have the selections available below. To work on a card, you must first Open the Hole. While a pain, this mode does allow alot of flexability in the way the program can work. Once your card image is loaded into memory, you can do practically anything with it. Once the .bin is in the program memory, you can use the Ambulance icon to clean the image in memory to the selected update. If in the Edit mode, you can manually alter the bytes in memory.

You will notice that the Expert mode has a patch feature. This feature will allow you to patch the .bin in memory with any standard H image. You can patch the .bin in memory with an entire card image, a CamID and zkt image, or just an image of an update or an update removal patch. This is also used to patch the card image in program memory with an HU CamID and ZKT patch so that an H card can be used with a winked 5th Gen. IRD.
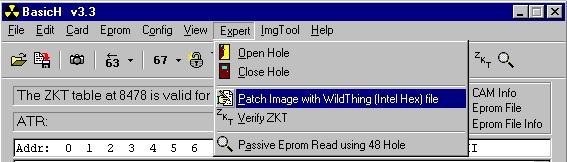
Using the patch feature for this example, we will select the patch feature and the following Windows screen comes up.
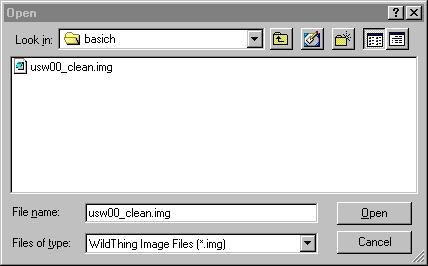
We will select the USW 00 image from the selections. Once selected, click on open and the patch will load.
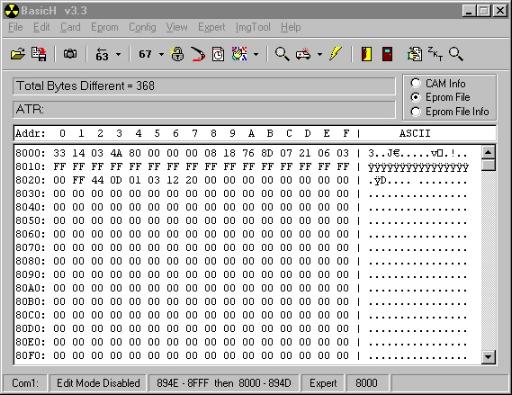
The screen will respond as below. The number of bytes changed by the patch will be indicated. The normal mode screen will show you each byte change that was made to the original image that was in memory before you started.
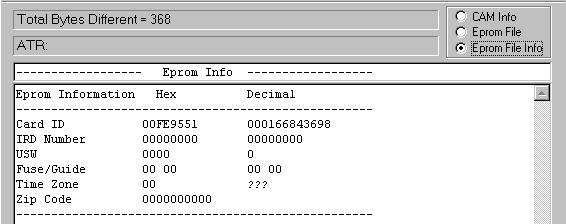
Checking the Eprom File Info, we see the results, below. The USW is now at 00 for the .bin in memory. Any update, 3M, or other patch or even multiple patches can be used with this feature.
At anytime, while a .bin is in memory, you can see if the zkt table matches the cam ID by clicking on the zkt icon. This will give the results shown below:
You will notice that the ZKT table for the loaded .bin is verified as correct.
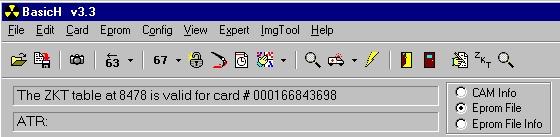
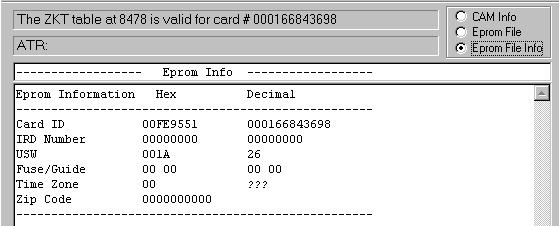
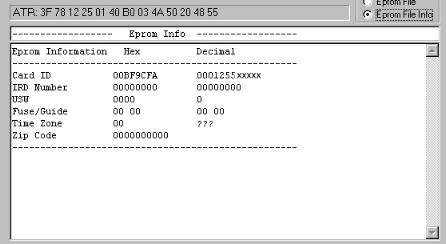
The view above was that of the Eprom File. You can select the Eprom File info screen by mouse clicking on that selection on the right of the screen. You get the display below:
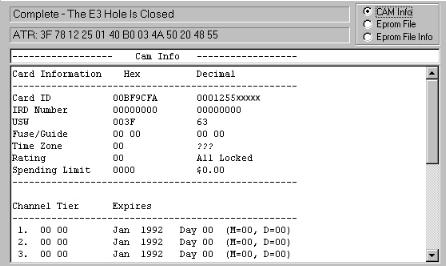
The CAM Info selection will give you the following display.
Once altered in the way that you want, you can write the image to the card by selecting the lightening bolt icon on the toolbar. The image in memory will be written to the card. You can also select save and save the modified image for later use if you want.
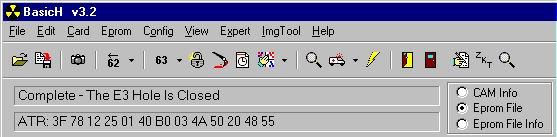
After you are done working on the card in the Expert Mode, be absolutely certain to CLOSE THE HOLE. Selecting this icon or selection will give you the program response shown below.
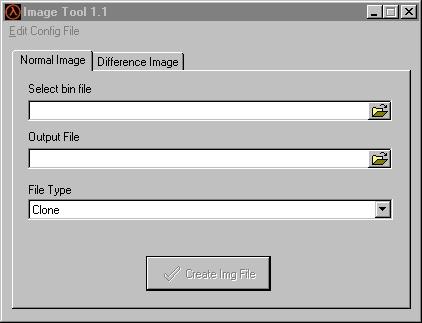
I have purposely skipped the Image Tool Selection of this program on the toolbar. It is basically the same one that was included with BasicH.04. It allows you to make images, difference images, update images, etc. Many of the features were covered in the unlooper guides and will not be covered here as they are not used by the average user.
I have provided this visual guide as a supplement to the Winexplorer 4.6 guide that I wrote. I did this to allow new users a full complement of Software Guides, covering all of the important programs available to the hobbiest. Again, if you use this guide, fine. If you want to claim it as your own, write one yourself. These are alot of work to do.
![]()
This Document is (c) copyright 2001 by Vorlon001, all rights reserved.